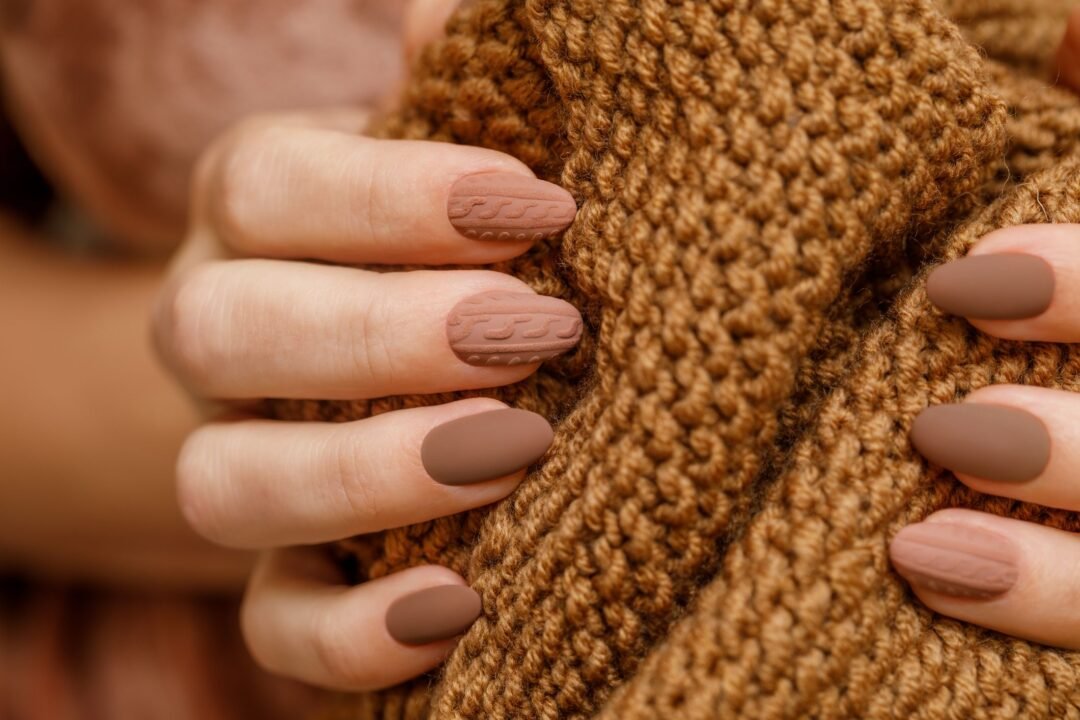
How to get the perfect light brown nails color? Achieving the perfect light brown nail color can be a delightful journey into the world of nail art and care. Light brown nails are versatile, elegant, and can complement a wide range of styles and skin tones. This guide will provide you with everything you need to know about selecting, applying, and maintaining the perfect light brown nails, along with tips for creating stunning nail art designs.
Understanding Light Brown Nail Colors
Light brown nail polish is a classic choice that can be both sophisticated and trendy. It’s a neutral shade that can range from beige and taupe to caramel and sand. Understanding the different tones within the light brown spectrum is essential for selecting the right color that complements your skin tone and personal style.
Shades of Light Brown
- Beige: A soft, pale brown with a hint of yellow. It’s a great neutral that works well for a natural look.
- Taupe: A mix of brown and gray, taupe can range from light to dark and is an excellent choice for a chic, understated look.
- Caramel: A warm, light brown with golden undertones, ideal for adding a bit of warmth to your nails.
- Sand: A light, yellowish-brown, reminiscent of beach sand, perfect for a fresh, summery look.
Choosing the Right Shade for Your Skin Tone
- Fair Skin: Light beige or soft taupe shades work well. Avoid colors that are too dark or too yellow.
- Medium Skin: Caramel and sandy tones can complement your skin. Taupe with a bit more depth can also be flattering.
- Olive Skin: Warmer light brown shades like caramel or a deeper beige can enhance your natural skin tone.
- Dark Skin: Richer light brown shades like deep taupe or caramel will look stunning. Avoid shades that are too pale as they may not stand out as well.
Preparing Your Nails
Before applying any nail polish, proper nail care and preparation are crucial for achieving a smooth and long-lasting finish. Here’s a step-by-step guide to preparing your nails.
Nail Care Essentials
- Nail Clippers: Trim your nails to your desired length. Make sure to cut straight across to avoid ingrown nails.
- Nail File: Shape your nails using a file. Go for a shape that suits your style, whether it’s square, round, oval, or almond.
- Cuticle Pusher: Gently push back your cuticles to create a clean nail bed.
- Cuticle Trimmer: Carefully trim any excess cuticle. Be cautious not to cut too much to avoid infection.
- Buffer: Buff the surface of your nails to remove ridges and create a smooth base for the polish.
- Moisturizer: Apply a good hand and cuticle cream to keep your nails and skin hydrated.
Nail Cleaning
- Remove Old Polish: Use a non-acetone nail polish remover to get rid of any old polish.
- Clean Nails: Wash your hands thoroughly to remove any oils or residue. You can use a nail brush for a deeper clean.
- Dry Nails: Make sure your nails are completely dry before applying polish to prevent bubbling and ensure proper adhesion.
Applying the Perfect Light Brown Nail Polish
Now that your nails are prepped, it’s time to apply your chosen light brown nail polish. The application process can significantly affect the final look, so follow these steps for a flawless finish.
Base Coat
A base coat is essential as it protects your nails from staining and provides a smooth surface for the polish.
- Application: Apply a thin layer of base coat to each nail. Allow it to dry completely before moving on to the next step.
Applying the Light Brown Nail Polish
- First Coat: Apply a thin, even layer of your light brown nail polish. Start from the base of the nail and move towards the tip. Don’t worry if the first coat looks a bit streaky.
- Drying Time: Allow the first coat to dry completely. This can take a few minutes.
- Second Coat: Apply a second coat of polish. This layer will provide better coverage and a more even color. If necessary, you can apply a third coat for extra opacity.
- Clean Up: Use a small brush dipped in nail polish remover to clean up any polish that has gotten on the skin around your nails.
Top Coat
A top coat helps to seal the color, add shine, and prolong the life of your manicure.
- Application: Apply a thin layer of top coat over your nail polish. Be sure to seal the edges by running the brush along the tip of each nail. This helps prevent chipping.
Drying and Setting
- Drying Time: Allow your nails to dry completely. This can take up to 15-30 minutes, depending on the polish.
- Setting Spray or Drops: Consider using a quick-dry spray or drops to speed up the drying process and prevent smudges.
Advanced Techniques for Light Brown Nails
For those looking to add a bit more flair to their light brown nails, there are several advanced techniques and nail art designs you can try.
Gradient Effect
A gradient or ombre effect can add a beautiful transition of colors to your nails.
- Tools Needed: Light brown nail polish, a lighter or darker shade of brown, a makeup sponge, and a piece of foil.
- Process: Apply the base color (light brown) to your nails. Dab the two shades of brown onto the sponge and gently press it onto your nails to create a gradient effect. Repeat if necessary and finish with a top coat.
Marble Effect
The marble effect is a sophisticated design that mimics the look of natural marble.
- Tools Needed: Light brown nail polish, white polish, a thin brush, and a cup of water.
- Process: Apply the light brown base color. Dip the thin brush in white polish and draw random lines on the nail. Use a small amount of acetone on a brush to blend the lines, creating a marble effect. Finish with a top coat.
French Tips
French tips with a twist can add a modern touch to your light brown nails.
- Tools Needed: Light brown nail polish, white or contrasting color polish, and nail tape.
- Process: Apply the light brown base color. Once dry, place the nail tape near the tips of your nails, leaving the ends exposed. Apply the contrasting color to the tips and remove the tape. Finish with a top coat.
Nail Art Stickers and Decals
Nail art stickers and decals are an easy way to add intricate designs to your nails without a lot of effort.
- Tools Needed: Light brown nail polish, nail art stickers or decals, and a top coat.
- Process: Apply the light brown base color. Once dry, place the stickers or decals on your nails. Seal with a top coat.
Maintaining Your Light Brown Nails
Maintaining your light brown nails ensures they stay looking fresh and beautiful for as long as possible.
Daily Care
- Moisturize: Keep your hands and cuticles moisturized to prevent dryness and cracking.
- Avoid Harsh Chemicals: Wear gloves when cleaning or doing dishes to protect your nails from harsh chemicals.
Touch-Ups
- Minor Chips: If you notice a minor chip, you can carefully apply a small amount of polish to the affected area and seal it with a top coat.
- Reapply Top Coat: Every few days, reapply the top coat to maintain the shine and protect your manicure.
Removal
When it’s time to remove your light brown nail polish, do it safely to avoid damaging your nails.
- Nail Polish Remover: Use a non-acetone remover, as it’s less harsh on your nails.
- Soak Method: Soak a cotton ball in remover, place it on your nail, and wrap it with foil. Leave it on for a few minutes before gently removing the polish.
Popular Light Brown Nail Polish Brands
There are numerous brands that offer high-quality light brown nail polishes. Here are some popular ones:
OPI
- Notable Shades: “Samoan Sand”, “Dulce de Leche”, “Tiramisu for Two”
- Features: OPI is known for its long-lasting formulas and wide range of colors.
Essie
- Notable Shades: “Sand Tropez”, “Glamour Purse”, “Mochachino”
- Features: Essie polishes are praised for their smooth application and rich pigments.
Sally Hansen
- Notable Shades: “Cafe au Lait”, “Beige Blast”, “Nude Now”
- Features: Sally Hansen offers affordable options with good durability and a variety of finishes.
Zoya
- Notable Shades: “Chantal”, “Flynn”, “Taylor”
- Features: Zoya is known for its non-toxic formulas and extensive color selection.
Deborah Lippmann
- Notable Shades: “Fashion“, “Naked”, “Sand Castle”
- Features: Deborah Lippmann polishes are high-end, featuring luxury formulas and unique shades.
DIY Light Brown Nail Polish
For those who love a bit of DIY, creating your own custom light brown nail polish can be a fun and rewarding project.
Ingredients and Tools
- Clear Nail Polish: Use a clear base polish as your starting point.
- Pigments: Use brown, white, yellow, and black pigments to mix your desired shade.
- Mixing Tools: A small mixing bowl, a stirring stick, and a dropper.
Process
- Mix Pigments: Start by mixing small amounts of the pigments until you achieve your desired shade of light brown.
- Combine with Clear Polish: Gradually add the pigments to the clear polish, stirring well to combine.
- Test and Adjust: Test the color on a nail and adjust the pigment ratios as needed until you are satisfied with the result.
- Store: Pour the mixture back into the nail polish bottle and seal tightly.
Seasonal Light Brown Nail Trends
Light brown nails can be adapted to suit different seasons by incorporating trendy designs and elements.
Spring
- Pastel Accents: Combine light brown with pastel colors like lavender or mint for a fresh, springtime look.
- Floral Designs: Add small floral patterns or decals for a delicate and feminine touch.
Summer
- Beachy Vibes: Pair light brown with sandy or coral shades for a beach-inspired manicure.
- Tropical Patterns: Incorporate tropical leaves or palm tree designs for a fun, summery feel.
Autumn
- Warm Tones: Mix light brown with warm shades like burnt orange or mustard for an autumnal palette.
- Leaf Designs: Add leaf patterns or gold accents to reflect the fall season.
Winter
- Metallic Accents: Combine light brown with metallic gold or silver for a festive, wintery look.
- Snowflake Designs: Add subtle snowflake patterns or glitter for a touch of holiday spirit.
Light Brown Nails for Special Occasions
Light brown nails can be styled for various special occasions to add elegance and sophistication to your look.
Weddings
- Bridal Nails: Soft beige or taupe shades with delicate lace or pearl accents can be perfect for a bride.
- Bridesmaids: Light brown nails with a touch of shimmer or subtle floral designs can complement bridesmaid dresses.
Parties
- Glitter and Glam: Add glitter top coats or metallic accents to your light brown nails for a glamorous party look.
- Bold Designs: Experiment with bold patterns or geometric shapes for a standout manicure.
Professional Events
- Classic Elegance: Stick to classic light brown shades like taupe or beige for a professional and polished appearance.
- Minimalist Designs: Opt for minimalist designs like a single stripe or a subtle gradient for a sophisticated touch.
Conclusion
Achieving the perfect light brown nails involves selecting the right shade, proper nail preparation, careful application, and maintenance. Whether you prefer a classic, understated look or enjoy experimenting with nail art, light brown nails offer endless possibilities. With this comprehensive guide, you are now equipped with the knowledge and techniques to create and maintain beautiful light brown nails that suit any occasion and style. So go ahead, experiment with shades, try out new designs, and enjoy the timeless elegance of light brown nails!


